
Shopping Cart


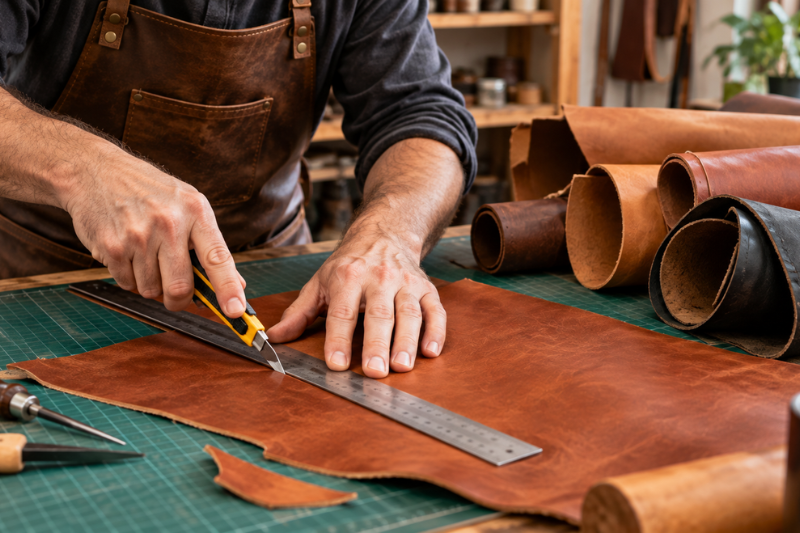
Making a leather wallet is a perfect project for getting started in leatherworking and learning how to work with a strong, durable material that offers a distinctive finish. With a good pattern, the right tools and a little practice, you can create a personalised wallet tailored to your needs and the style you prefer.
In this article, we explain how to make a leather wallet step by step, which materials you need and the basic techniques for cutting, preparing, stitching and finishing the pieces. You will also find other ideas for handmade leather accessories to help you continue developing your skills.
Before getting started, it is important to prepare all the materials and tools you will need. The choice of leather will depend on the type of wallet you want to make, the thickness you require and whether you are looking for a firm structure or a more flexible finish.
In our leather and hides for artisans section, you can find different options for your leatherworking projects.
To make a basic wallet, you will normally need:
In the leather tools category, you will find different tools for preparing and working on your pieces with greater precision.
The pattern is one of the most important parts of the project, as it defines the shape, dimensions and layout of the wallet. Before cutting the leather, it is advisable to check that the design includes all the necessary pieces: outer body, flap, compartments, card slots, coin pocket or any other element you wish to add.
If you are just starting out, it is best to choose a simple model with few pieces and an easy-to-assemble structure. This way, you can focus on learning the basic techniques without making the process unnecessarily complicated.
It is also advisable to make a preliminary test using card or thick paper. This will allow you to check the wallet’s size, the position of the folds and the capacity of the compartments before using leather.
In our section of patterns for making a purse or wallet, you can find a practical design to start working on this type of project.
You can also browse the leatherworking books and patterns category to discover other designs and learn new techniques.
Place the pattern on the leather and make sure the piece is clean, flat and free from deformations. Secure the pattern or use small weights to prevent it from moving while you mark the outline.
Mark the lines using a leather-specific pencil, a marking wheel or a suitable tool. Pay particular attention to the stitching allowances, folds and areas where the different compartments will be joined.
Before cutting, check the direction of the leather and make sure all the pieces are positioned correctly. If the design has a visible section with a particular texture or pattern, it is important to take this into account so that the final result is uniform.
Make the cuts on a suitable cutting surface and use a metal ruler to keep the lines straight. It is preferable to make several gentle passes with the blade rather than trying to cut through the entire thickness in one go, especially when working with thick leather.
Keep the blade sharp to avoid uneven cuts, damaged edges or deformations in the pieces. Also check that pieces which need to be symmetrical are exactly the same size.
Once cut, place all the pieces together and check that they fit according to the pattern. This check helps identify errors before continuing with the assembly.
The edges are an essential part of a wallet’s finish. If they are rough or uneven, the final result may lose quality and feel less pleasant to the touch.
Depending on the type of leather and the finish you want to achieve, you can:
Always work carefully and avoid removing too much material. The aim is to achieve uniform, smooth and well-defined edges.
Before stitching, you need to mark the line along which the stitching will run. To do this, you can use a ruler, a marking wheel or a suitable pricking tool to maintain an even distance between the holes.
Then, use a leatherworking awl to prepare the holes. This tool allows you to make or enlarge holes and is particularly useful for handmade stitching projects.
Try to ensure that all the holes are evenly spaced and that the stitching line remains parallel to the edge. Good preparation will make stitching easier and give the wallet a cleaner finish.
Hand-stitching is one of the most widely used techniques in leatherworking because it allows the pieces to be joined securely while adding a distinctive handmade finish.
To begin, prepare a needle at each end of the thread and use a stitching technique suitable for leather, such as saddle stitching. This method allows you to work with two needles and achieve a strong, durable join.
In our threads for sewing leather category, you can find different options to choose the colour and thickness best suited to your project.
During stitching, try to maintain constant tension. The thread should be firm, but not excessively tight, to prevent the leather from deforming. Also check that the stitches have a consistent angle and spacing.
Before carrying out the final stitching, position the pieces and check that the compartments are properly aligned. You can apply a small amount of leather-specific adhesive to the joining areas to prevent the pieces from shifting.
If the wallet includes card slots, pockets or a coin compartment, assemble the inner pieces first and then attach them to the main body. It is important to follow the order indicated in the pattern, as some stitches may become hidden when new layers are added.
Work in an organised manner and check each join before continuing. Good planning will help you avoid having to unpick or disassemble parts of the wallet.
Once you have finished stitching, cut off the excess thread and secure the ends properly. You can fasten the ends using a suitable finishing technique and, if necessary, conceal them between the layers of leather.
Check all the edges, remove any adhesive residue and make sure the wallet opens and closes correctly. You can also apply a suitable leather conditioner to keep the leather flexible and protected.
Finally, gently fold the areas designed for folding to help the wallet take shape. Avoid forcing the leather, especially during the first few uses.
Once you have learned how to make a leather wallet, you can use the same techniques to create other handmade accessories. Many projects involve similar processes, such as marking, cutting, punching, gluing and hand-stitching.
Some handmade leather accessory ideas include:
Leather crafts offer many opportunities to develop creativity and learn how to use different tools. You do not need to start with complex projects: small accessories allow you to practise and better understand how the material behaves.
In addition to wallets and coin purses, you can explore techniques such as engraving, leather tooling, dyeing, braiding or decorative stitching. Each one offers new possibilities for personalising your creations.
If you are looking for ideas and projects to continue learning, visit our Free Resources section, where you will find patterns and ideas for making different leather projects.
Although practice is essential, a few tips can help you improve the result from your very first project:
Making a leather wallet is a practical way to get started in the world of leatherworking and discover everything you can create with this material. With a suitable pattern, good tools and quality materials, you will be able to develop increasingly elaborate and personalised projects.
At Curtidos Cabezas, you will find leather and hides for artisans, tools for working with leather, threads for hand-stitching, awls, patterns and other materials needed for your creations.
Explore our categories and find everything you need to turn your ideas into unique, functional and handmade leather accessories.


Comments (0)