Burin engraving was born alongside goldsmithing and the decoration of weapons during the Middle Ages. With the Renaissance, it became established as a printing technique on copper and steel plates, forming the basis of etching and image reproduction. Over the centuries, burin engravings stood out for their clean lines, contrast, and ability to create volume through hatching and cross-hatching.
Today, hand engraving with a burin coexists with modern methods (laser, CNC), but it remains relevant thanks to its precision, tactile control, and artisanal aesthetics — qualities highly valued in jewelry, knife making, leatherworking, and fine art printmaking.
Key Materials and Tools for Burin Engraving
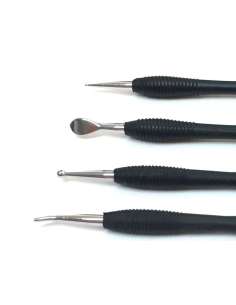
To get started — or improve — in a burin engraving course, you need a solid base of tools. The essentials:
Tip: label your burins by profile and angle. A simple code with tape and marker speeds up workflow and avoids mistakes when switching tools.
Techniques and Styles in Burin Engraving
In burin engraving (intaglio), edge control and pressure define the style. The main approaches:
Pure line: continuous, clean strokes for contours and typography.
Hatching and cross-hatching: parallel or crossed lines to create shadows and volume.
Stippling: micro-dots or small strokes for organic textures.
Mixed: combination of line, hatching, and stippling for maximum visual richness.
Applications by material:
Metal (steel, brass): high-contrast engravings for jewelry, knives, plates.
Wood: blocks for artistic printing with a calligraphic character.
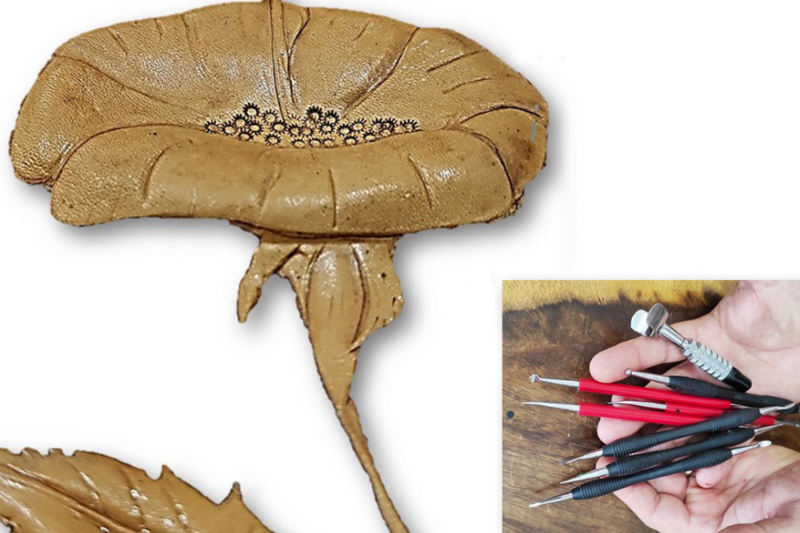
Leather: logos, borders, and floral motifs. Here, hand engraving with a burin is used as a fine marking tool, often combined with a hot creaser or light embossing.
Practical Tips for Working with Burins on Leather and Metal
Perfect sharpening: a well-sharpened burin requires less force, skips less, and leaves a clean stroke.
Constant angle: keep the attack angle stable; “teeth” in the line usually come from unintentional variation.
Secure the piece: use a vise, engraver’s ball, or double-sided tape to prevent micro-movements.
Pre-guides: draw with a hard pencil or awl; reduces errors and helps plan hatching.
Logical sequence: contours first, then lights/volumes, and finally textures.
Short breaks: fatigue weakens control. 2–3 minute pauses every 15–20 minutes maintain precision.
Step-by-Step Projects: How to Create Burin Engravings
Project 1 (metal): initials plaque
Transfer: print your initials and transfer with carbon paper or tracing.
Contours: use a straight burin to outline each letter.
Thickening: slightly widen the main strokes with a V-shaped burin.
Shading: fine hatching in inner areas for volume.
Polishing: deburr with rubber or fiber and apply paste for shine.
Project 2 (leather): minimalist monogram
Tracing: lightly mark when damp; vegetable-tanned leather responds best.
Marking: with a fine burin, define guide lines without going too deep.
Reinforcement: repeat the stroke for uniformity; combine with a hot creaser for emphasis.
Sealing: condition and protect with wax or a specific finish.
Project 3 (wood): small printing block
Drawing: invert the design (it will print reversed).
Carving: V-shaped burin for contours; preserve printing areas.
Testing: ink and test prints; adjust where contrast is lacking.
Burin engraving process: design → transfer → securing → main cuts → shading → cleaning and finishing → protection.
Care, Maintenance, and Sharpening of Burins
A maintenance plan extends the lifespan of your tools and improves line quality:
Regular sharpening: set a consistent micro-bevel; finish with polishing paste.
Cleaning: remove burrs and debris after each session (especially on dyed leather).
Storage: case or magnetic board with tip protectors.
Inspection: replace cracked handles and correct deformed tips.
Workshop tip: keep a simple log (date, material, issue). It helps correlate problems with edge condition or techniques used.
Where to Buy Quality Burins Today
To ensure precision and durability, purchase your tools from suppliers specialized in engraving, jewelry, or leatherworking. Look for:
Tempered, well-finished burins with consistent profiles.
Variety of tips (straight, V, lozenge) and ergonomic handles.
If you are starting out, a basic kit with 3–4 profiles, a sharpening stone, and a magnifying lamp will let you progress without major investment, and you can always expand with specific profiles as your style evolves.
AtCurtidos Cabezas we offer everything you need for your embossing projects.
Master Burin Engraving with Precision
Burin engraving requires patience and sensitivity, but rewards with clean lines, expressive shading, and an unmistakable professional finish. Whether you admire great burin engraving artists or are just starting out, incorporating practice routines, proper sharpening, and clear methodology will help you grow with confidence.
Ready to create your engravings? Get inspired, practice daily, and build a set of tools that grows with your progress.


Comments (0)