Shopping Cart
- Curtidos Cabezas
- Cueros
- 0 likes
- 8011 views
- 0 comments
Practical Guide to Making a Leather Tool Bag
Making a leather tool bag—whether for yourself or as a gift—allows you to customize the design according to your needs and taste. However, regardless of the final purpose, in this step-by-step guide we’ll give you useful tips to help you create a piece that is aesthetically impressive and, above all, practical.
Ready to create this functional piece from scratch? Let’s get started:
Materials Needed to Make a Leather Tool Bag
These are the materials you’ll need to craft a leather tool bag:
- Quality Leather: The first thing to choose is the raw material—a strong and durable leather. You can choose full-grain or split leather depending on your aesthetic preference and budget. Later on, we will suggest some great options for this type of project.
- Patterns and Templates: The next step is to find patterns for tool bags based on the type of tools you plan to store. A good idea is to choose a pattern and redesign it according to your specific needs.
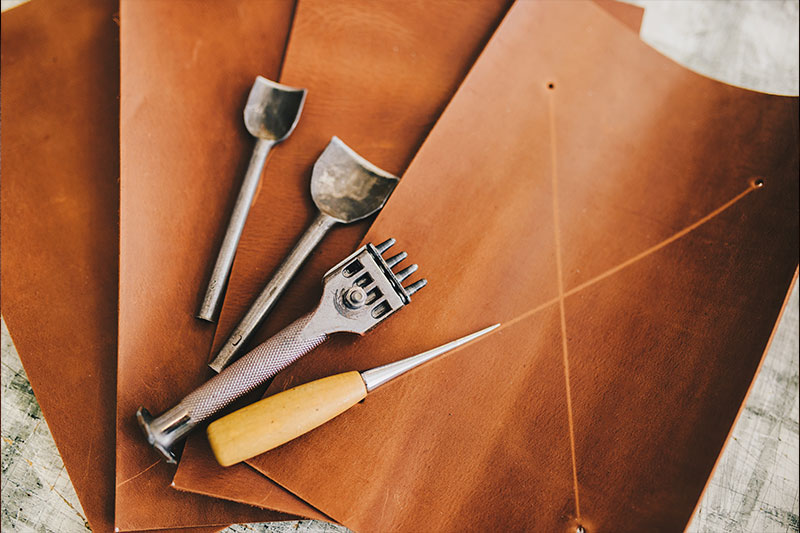
- Cutting Tools: Cutting tools are essential when working with leather. For this project, make sure you have a precision cutter and specialized leather scissors.
- Leather Needles and Thread: The sewing tools are crucial. Use strong leather needles and waxed thread that matches your leather.
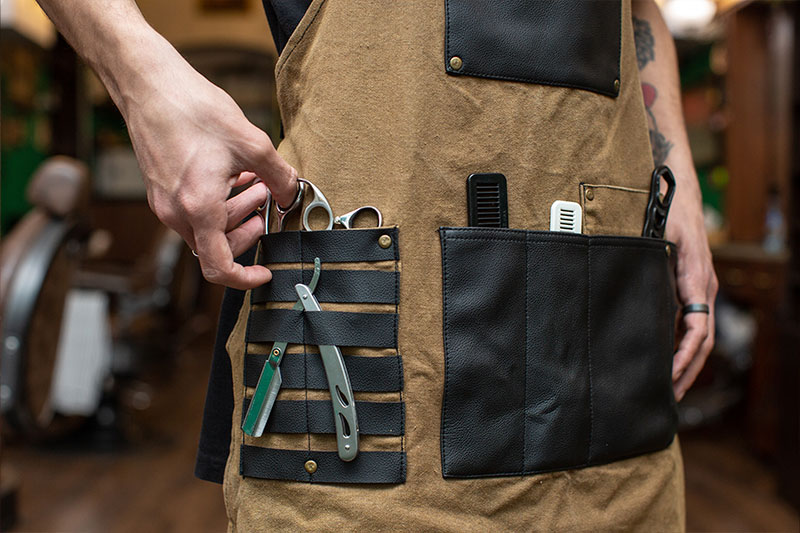
- Snaps and Closures: This depends on the design you choose. You can add snaps, buckles, or closures. Always choose strong hardware to ensure safety when storing and transporting your tools.
Steps to Make a Leather Tool Bag
Follow these steps to make your leather tool bag:
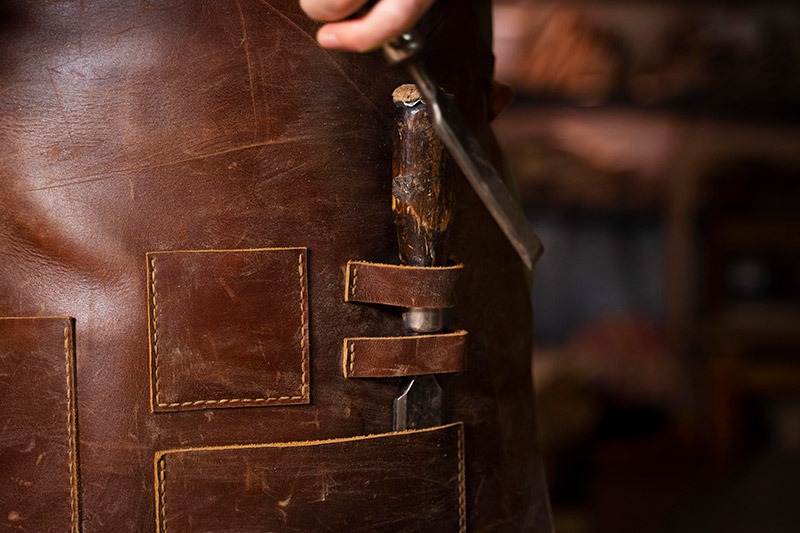
Step 1 – Design and Pattern: Draw your pattern on paper. Adjust the shape and size depending on the tools you are going to store. Make sure to include flaps and closures if needed.
Step 2 – Cutting the Leather: Once the pattern is ready, place it on the leather and mark the cut and fold lines. Cut the material carefully and precisely, especially if you will use any filler that could alter the shape. Don’t forget to mark the stitching areas.
Step 3 – Sewing: Now it’s time to join the pieces. Use a strong needle and waxed thread to sew all sections. Make sure your stitches are even and tight.
Step 4 – Finishing: The final steps are to review and refine the piece. Trim excess leather and thread, and sand the edges with fine grit for a clean finish.
In our book section, you’ll find many materials and tools that will help you work with leather, whether you’re a beginner or experienced. These resources will be very useful for this and other projects.
Useful Tips When Making a Leather Tool Bag
Now that you have a general idea of how to make a practical and functional leather tool bag, here are some additional tips to achieve a high-quality result.
Choosing the Right Leather
Choosing the right material is key. When selecting leather for tool bags, durability, resistance and aesthetics are crucial.
At Curtidos Cabezas you’ll find the best leather options—all high quality, firm and resistant. Some recommended choices for this project include:
- Cowhide: A robust, durable leather ideal for heavy tools and frequent use. It tends to have a thicker texture and rustic appearance and is resistant to wear and sharp edges.
- Buffalo Leather: Similar to cowhide but even stronger. Perfect for carrying rugged materials and heavy tools.
- Calfskin: Less common, but offers a unique combination of strength, softness, aesthetics and flexibility. Good for smaller or delicate tools.
- Pigskin: Surprisingly durable and affordable. Curtidos Cabezas offers excellent pigskin options for lightweight tool bags.
Reinforcing for a Better Finish
A key tip for achieving a long-lasting tool bag is to reinforce the areas most prone to wear, such as edges and corners. This ensures durability even with frequent use.
Customization Options
We always recommend creating a custom pattern or modifying one you like. Add internal pockets, loops for small tools or even a space for a small notebook to make the bag more versatile.
Another idea: personalize it with your initials or your company logo for a more elegant and unique finish.
Testing and Final Adjustments
Remember to test the bag with your tools before final stitching so you can adjust the design based on your needs.
Regular Maintenance for Long-Term Durability
Proper care is essential to maintain both the bag and the tools inside. Here are some simple tips:
- Clean the bag regularly to remove dust and dirt.
- Avoid exposing it to moisture or excessive sunlight.
- Inspect and repair small damages promptly.
- Use recommended products to condition and maintain the leather.
- Keep tools organized and avoid overloading the bag.
Now that you have all the information you need, what are you waiting for? Start crafting your new leather tool bags today. At Curtidos Cabezas, you’ll find the best materials at the best price. Unsure which leather is best for your project? Contact us and our team will give you personalized advice.
Comments (0)